[Git]Git-CLI 버전관리 with 생활코딩 - 5.추가기능
후아.. 버전 관리 툴로써의 git 마지막 포스팅이 되겠구만!
간단하게 추가적인 기능, 편리한 기능들 몇가지만 살펴보려고 한다.
시작해봅시다!
먼저 git log를 살펴보자.
$ git log --all --oneline

fea7dc5 (HEAD -> master) Revert "Version2"
a23df4a Version2
bd66197 Version1
현재 Version1이 만들어졌고, Version2를 만들었다가 다시 Revert를 사용하여 Version2를 지운 효과가 적용된
시점이다.
예시를 조금 더 명확하게 구별하기 위해, File3를 만들고 File1,2를 열어 다음과 같이 입력해주자.
[File1.txt]
  ABC

[File2.txt]
  123

[File3.txt]
  890
$ ls -l
-rw-rw-r-- 1 cabox www-data 4 Apr 29 07:13 File1.txt
-rw-rw-r-- 1 cabox www-data 4 Apr 29 07:12 File2.txt
-rw-rw-r-- 1 cabox www-data 4 Apr 29 07:12 File3.txt
$ git status
On branch master
Changes not staged for commit:
(use "git add <file>..." to update what will be committed)
(use "git checkout -- <file>..." to discard changes in working directory)
modified: File1.txt
modified: File2.txt
Untracked files:
(use "git add <file>..." to include in what will be committed)
File3.txt파일을 열고 git status 명령어를 입력해보면, File1과 File2는 tracked 상태이고 File3는 untracked 상태이다.
다음 명령어를 입력해보자.
$ git commit -am "commit without File3"

[master daa63a3] commit without File3
 2 files changed, 2 insertions(+)


 $ git log -1 --stat --oneline  # -1 옵션을 추가해주면 최근 1개의 커밋을 확인할 수 있다.

daa63a3 (HEAD -> master) commit without File3
 File1.txt | 1 +
 File2.txt | 1 +
 2 files changed, 2 insertions(+)
커밋 내용을 보니, File1, File2는 commit이 되었는데 File3는 commit 되지 않은 상태이다.
-am 옵션은 tracked되어있는 파일, 다시말해 이전에 commit 이력이 있었던 파일들에 대해서
따로 add를 하여 Staging Area에 파일들을 추가하는 과정을 건너뛰고 바로 commit 시켜주는 옵션이다.
tracked 되어있는 파일들만 빠르게 commit하고 싶을 때 편리한 기능이다.
이제 File3도 add하여 다음과 같이 commit 해보자.
$ git add File3.txt

$ git status

On branch master
Changes to be committed:
  (use "git reset HEAD <file>..." to unstage)

        new file:   File3.txt

$ git commit
입력하면 에디터 창 하나가 열린다.
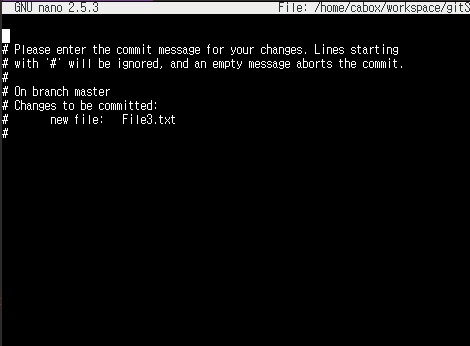
작성자의 경우에는 기본적으로 nano 에디터로 열리는데, 항상 vim을 기본 에디터로 써오던 탓에
vim에 많이 익숙해져있고 설정도 되어있기 때문에 기본 git 에디터를 vim으로 설정하고싶다.
그런 경우에, 다음과 같이 입력해보자.
$ git config --global core.editor "vim"

$ git commit
훨씬 깔끔한 vim으로 commit 창이 열렸다.(디자인은 사용자 설정을 바꾼것이기에 사진과는 다르게 나옵니다.)
완성!
여기까지, git command line interface를 통해 파일들을 버전화하여 CRUD 작업 및 설정들을 해보았다.
다음 포스팅부터는 git을 서버에 연결하고 backup 툴로써 활용해보는 시간을 가져보겠다.!
[git 명령어 정리]
| git init | git을 사용할 디렉토리를 초기화(지정)한다. |
| git status | Working Tree의 내용을 출력한다. |
| git add | 파일을 Staging Area에 추가한다. |
| git commit | Staging Area의 파일들을 Repository에 추가한다.(버전화) |
| git log | 지금까지의 버전들을 살펴본다. |
| git checkout | 원하는 시점의 버전으로 이동한다. |
| git reset |
원하는 시점의 버전으로 이동하는 동시에 해당 시점 이후의 버전들을 전부 삭제한다. |
| git revert | 버전을 삭제한 효과를 적용한 commit을 생성한다. |
| git config | git 관련 설정하기 |